Style settings
Once saved the new style switcher, push the
 button. You will see the style manager page.

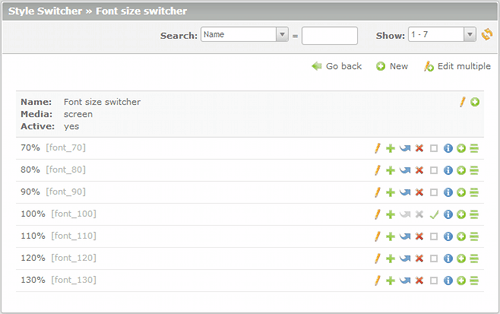
On this page you can manage all the styles, deciding their order too. Sorting is used to know which style activate when using the NEXT/PREVIOUS buttons. Otherwise, if you do not use buttons, sorting determines the display order. Finally, it is very important to define a default style: this one will be loaded if you do not know the user's preferences.
The buttons on this page perform the following functions:
 Go back to style switcher manager.
 Add a new style.
 Edit multiple styles at once.
 Edit a style.
 Copy a style.
 Move a style.
 Delete a style.
 Set the default style.
 Show details of a style.
 Drag a style.
Then, create a new style pushing the
 button. You will see a page where you can enter the following information:
- Name: the name of the style.
- Use an internal CSS: enable this option if you want to use a Contao
managed style instead of an external CSS file; depending on this choice, it will be
showed one of the following:
- the list of Contao managed styles, from which you have to choose one;
- the list of CSS files on your server, from which you have to choose one.
If you didn’t previously enable NEXT/PREVIOUS/DEFAULT buttons, you will have to set:
- Button title: the text that appears when you move the mouse over the button;
- Button label: the text displayed in the button;
- Button image: the image displayed in the button;
- Tab index: the position of the navigation item in the tabbing order;
- Access key: the key for focusing the item.
In our scenario, you can enter the following values:
- Name: "70%"
- Use an internal CSS: enabled
- Style sheet: font_70
In a similar way you can add the other styles. When done, set the font_100 style as the default.